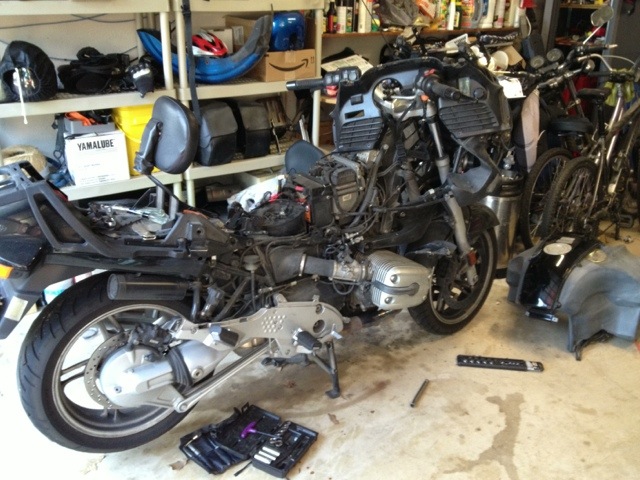
The LED replacement lamps came in yesterday, but since I had kendo practice, I couldn’t get started on them until today. Getting the tach out was a real pain, but once it and the speedometer were out, replacing the lamps was easy. It turns out that I had two burned out bulbs, one in each instrument. I had to fiddle a little bit to get them all working, since the LEDs are polarized where incandescent bulbs are not. But once I got that sorted out and the sockets replaced, I could start buttoning the bike back up. While I was at it I also started the installation of my RCU shelf. It’s in, but not completely tightened down, until I can finish the adjustments. The new lamps are really bright, making the instruments so much easier to see. Next up is using the new compressor to blow some of the dirt and gravel out of the nooks and crannies of the engine area while I’ve got the tank off. Then reinstalling the tank, and starting in on the fluid changes.
Monthly Archives: March 2013
The RT’s 72,000 Mile Service – Part 2
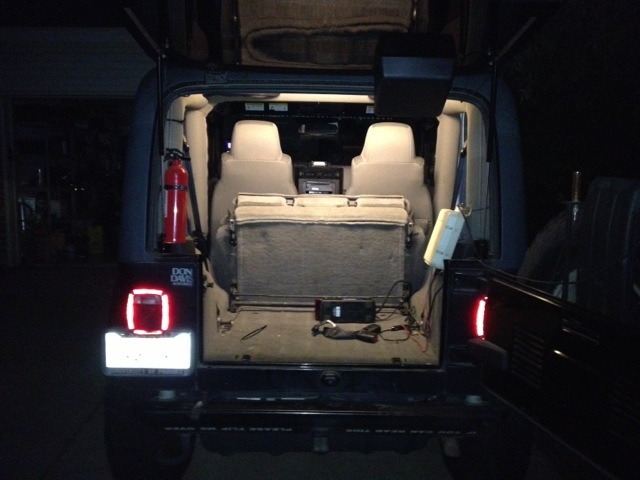
I didn’t do too much on it today, just more disassembly since I’m waiting on parts for fixes that weren’t in the original plans. The gas tank is completely removed now, ready to do the fuel filter replacement, and I’ve taken the windshield, upper fairing, and dash off so that I can get at the instruments. The LEDs should be in on Thursday, as will the spark plug wires. But since I’ve got Kendo practice that evening, those tasks will wait until Friday or Saturday. Taking the dash off was interesting, especially having to move the speaker pods in order to get at the last bolts. But it’s all done now. Hopefully UPS and USPS are running on time. I’m itching to getting the bike back to looking like a bike because right now it, as Chuck put it on Facebook, “looks like a bomb has gone off”.
The RT’s 72,000 Mile Service – Part 1
All of the parts and supplies are in, so I’m getting started on the 72,000 mile service on the R1150RT. The first things to do are to take off the hard bags, then put it up on the center stand and remove the seats, tank bag, and fairings. Once I got that out of the way, I started in on the work by replacing the air filter. The old one was filthy and the airbox was full of dead bugs, mostly butterflies and grasshoppers, which had to be vacuumed out. Once the new filter was installed and the airbox buttoned back up, I started in on the spark plugs. There are two per cylinder, and while the left hand cylinder went fine, the right hand one threw a monkey wrench in to my plans. The secondary plug’s boot isn’t sealing and the connector has rusted out. I actually dumped rust out of it when I pulled it off. That’s now on the replace list. With all four plugs replaced, I buttoned up as much as I could, and headed in. Tonight’s homework is to find the plug wires, a new socket for the front left turn signal bulb, and LED bulbs for the speedo and tach and get them ordered.

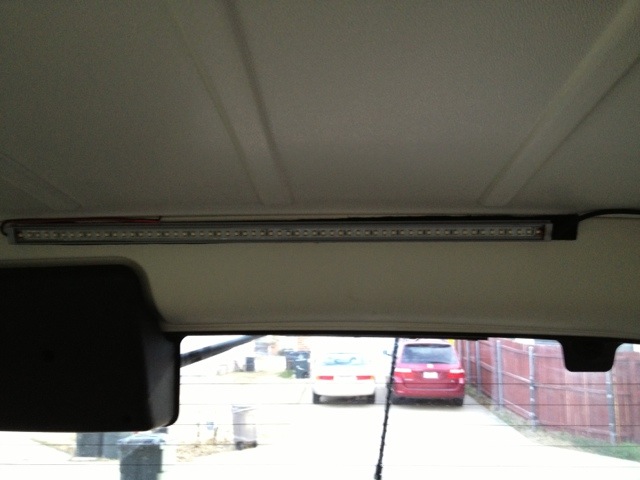
Lighting For The Cargo Area
I upgraded the interior lighting to LED bulbs and built a switched control box for a 24″ light bar that is now mounted above the back glass. Since Daimler-Chrysler removed the rear dome light from the hard top prior to my model year, I’ve been dealing with a very dark rear cargo area and finally got sick enough of it to do something about it. The bar is really bright, as you can see, but only pulls 4.8 watts. I’ve got it wired in to my ham radio power distribution block, so it’s live all the time. Between that and the other two pairs of bulbs, the interior is significantly brighter.